Saturday, August 2, 2014

Make It Monday #174 Diamond Wallpaper Stamping Challenge


I have challenged myself to join some challenges!  I have done a few but one that I really like is Papertrey Ink.
This week, Ashley Cannon Newell shares how to use your stamps to create wallpaper background designs. Get ready to stamp your heart out!
Find the video and website here.     Here is my take on the challenge.


I am new to PTI (papertrey ink) but I have a good friend who has a few things.  The 'diamond' shapes came from her stash of PTI-  (button boutique stamp set) .  The ink and cardstock are from CTMH along with the cute poke-a-dot ribbon and brads.  I also added a little sparkle (glitz red) from CTMH to give each intersection just a little extra sparkle.  Below is a close up of the sparkle and ribbon.
Use the link for the video to get you to the challenge details and all the other wonderful cards that were posted.  Thanks for visiting and come back tomorrow for a huge announcement!!


Tuesday, July 22, 2014

Been Busy- New Quilt Embossing folder

We have had a ton and 1/2 of people here for the family reunion.  And I am just guessing that number because I thought it would be rude to ask everyone how much they weighed!  heehee

I have a new embossing folder that I am just dying to try.  Maybe my husband will let me work downstairs tonight.  We both have been so busy with company and now I have two more people added to my list of THANK YOU... home made card list.

Here is a picture of the embossing folder.
If you can see it has various squares with unique patterns, much like a quilt.  I thought it would be really cool to emboss is different colors and cut them out and stick them on as layers. I cant wait to play.  Do you have a suggestion for me on what else I can try?  Make a comment and if I try your technique, I will send you the card, blank so you can send it to someone else.  Hope to hear from you.  Theresa and thanks for stoppin by! 

Here is what I have made so far!!!


 Which one do you like best?  They were all fun to make and each of them has a home to go to already.  The first one will go to some relatives that stayed at our house after the reunion and we had a super time together.  The second one is going to a business man who helped make their visit a little more special and the last goes to a lady I take care of.  Hope you enjoyed seeing my cards and see you again.... I hope... with inkyfingers!  Theresa

Wednesday, July 16, 2014

Wishing you a doggone good day!!!


Here is a card I made for the vet who cleaned Pepper's (our dog) teeth.  I wanted to say thanks for taking such good care of him for us.  I used sequins in the shaker part of the card.   This is the first time I have used them on a card and I like it. 


This is a picture of Pepper when we first got him last year.  He is about 10 years old and is a super good dog.  He does not like thunder or loud noises and sheds but other than that he is excellent.  He listens all the time except when his is upset, like during a storm.  Hey, I can deal with that.
Here is a close up of the shaker part of the card.
I got the dog image from a CTMH stampset that I have had for a long time called A Bowwow.  It has the dog, the sentiments Hello and Wishing you a doggone good day! and one of those thought/comment circles and a bone that I enlarged so I could put the word Hello on the bone.  Small set but very cute. 

Hope you have enjoyed my shaker card made for a special group of people who took good care of someone special to us!  If you would like to know more about the card, how it was made or would like to leave a comment, that would be super!!  Thanks for stoppin by!  Theresa

AND GOOD NEWS!  Peppers pressure measurements were down to normal today for his Glaucoma test!!!  That is very important because it might mean he does not have an aggressive form of glaucoma that usually ruptures the eye without warning.  We are for sure.....
HAVING A DOGGONE GOOD DAY!  Hope you are too!

PTI Challenge #172 Rainbow Medallions

Yesterday was a wonderful day!! I got to spend it with my mentor and super friend Patti and we played with paper.  Our goal was to create a card that would qualify for the PaperTreyInk Make it Monday #172 challenge- Rainbow Medallions. But you know when you get together with a wonderful friend sometimes you spend more time chattin than scrappin so.... we only got one, yes one! card done but here it is.....
 I used the Doodlie-Do stampset from PTI for the beautiful rainbow medallion, a awesome button from Patti's stash. Bakers twine and cardstock were from CTMH and the inks were a combination of CTMH and stampin up.  This challenge was exactly that!  A challenge.  We tried various shapes until we found what we liked most.
Check out the brilliant card that Patti did on her blog: StationeryStyles.blogspot.com


For the inside of the card I chose a stampset from CTMH called Treasure Life.  I added the color around the sentiment by using the corner of the ink pads to apply a small amount of ink and making little slash like marks.  It takes a little practice but it is really a great result.  If this is new for you, try it and let me know how you like it.


Well I am preparing to take a photo of the cutest little card I made for our veterinarian.  I will get that one on asap.  Thanks for visiting and leave a little note if you wish with comments or questions!  Have a super scrappin day!

Tuesday, July 15, 2014

Time to scrap! Graduation card and blog candy update

I am getting together with a friend later today to scrap.  I think we will make some really cool cards and then I will post them for you to see!!

This is what I have been working on the last few days.  I was the idea on pinterest and pinned it in my 'cards I want to make' board if you would like to see the original.

A friend asked me to make a graduation card for her and so I went snooping around and found the inspiration for this:

Its a work in progress but wanted you to see something on my blog in case you stop by today.  I still have to attach everything and add a tassel and make a money holding pocking inside with the name of the graduate.  I think it is turning out pretty good.  Come back tomorrow and see the finished card and a much better set of pictures!!!
Now I have to get going.  I am packing some supplies and going to scrap with my mentor Patti.  You can visit her blog at stationarystyles.blogspot.com
Patti did it!  She challenged herself to make 100 cards in 100 days and they were SUPER!!  And not only did she make 100 super duper cards, she is going to pick a winner from the comments of those who visited her the last 100 days!!  Click on the link above to see more for yourself!
Thanks for blogging with me and see you again tomorrow!!  with updates!!   Theresa
Oh and if you would like to see my business website it is now up and running!!
morelikehome.com.  I am a self employed home healthcare provider.  My website will tell you more.  Thanks for visiting:)

Sunday, July 13, 2014

My first challenge ever and its with AAA Cards!


This is my first entry.  I have never entered in a challenge!  I know sounds crazy but this is my first!!

Below are two cards I made using the challenge found at AAA Cards.  You can use any watercolor media you prefer.
 I used the spray pritzer from Close To My Heart.  Added a few drops of blush reinker and the rest water.  I sprayed until I got the soft background I wanted.  The butterflies are stickers I got from the dollar store (7-8 for $1.00) and I could not resist getting 6 packs all in different colors.  This one from a black and white set of 7.  I added 3 rhinestones also from Close To My Heart and washi tape that I received as a gift. 


 Here is the first card I tried it on.  I like it but the wet ink made the card a little flimsy so I made the card above with layers of cardstock to give it strength. 


 Thanks for visiting and hope to see your comments and your artwork too!  Theresa


 "Use any watercoloring media you enjoy most. Have fun with wild colorful watercolor Embossings, or  Fine Art paintings, Color washes and splashes. Your watercoloring can be the background or the detail, an embellishment or die cut- we're very open to design and technique. We ask that your submission be in the CAS style. And this week please tell us about your paints of choice."


Friday, July 11, 2014

HIT THE JACKPOT!

Today I would like to share with you a few cards that I made.  I guess I am into the butterflies more than anything else.  It might be because my good friend lent me some butterfly embossing folders and dies.  But also because I HIT THE JACKPOT with BUTTERFLY STICKERS at the DOLLAR STORE IN RICE LAKE WI.  by Walmart.  YES!!!YES!!! each sheet had 7 or 8 BEAUTIFUL BUTTERFLIES just ready to mount onto my cards.  Here are a few cards I made with them.

 Let me know what is your favorite.  I like the last one best.
(colors are pear and creme burlee from CTMH)


Thursday, July 10, 2014

Last Chance to get blog candy from StationaryStyles.

If you have not had a chance to visit Patti's StationaryStyles blog to see her wonderful artwork lately you might not know she is giving away BLOG CANDY!!

Go to THIS POST to find out more.  Now back to my pinned cards from Pinterest to see what I will create today!

Wednesday, July 9, 2014

Finally.... back at my craft table!

It has been too long since my last post.  Sorry but I have been very busy.
I would like to try to build my blog and will try and welcome and visit all new bloggers who become followers to INKYFINGERS1!  Also visit my boards at http://www.pinterest.com/theresakrout9/

So please welcome Kristie Goulet and visit her creations at
KreativeKristies.blogspot.com.   Click on FOR SALE and you might just find a few items to purchase and add to your collections.  Thanks Kristie for following my blog!


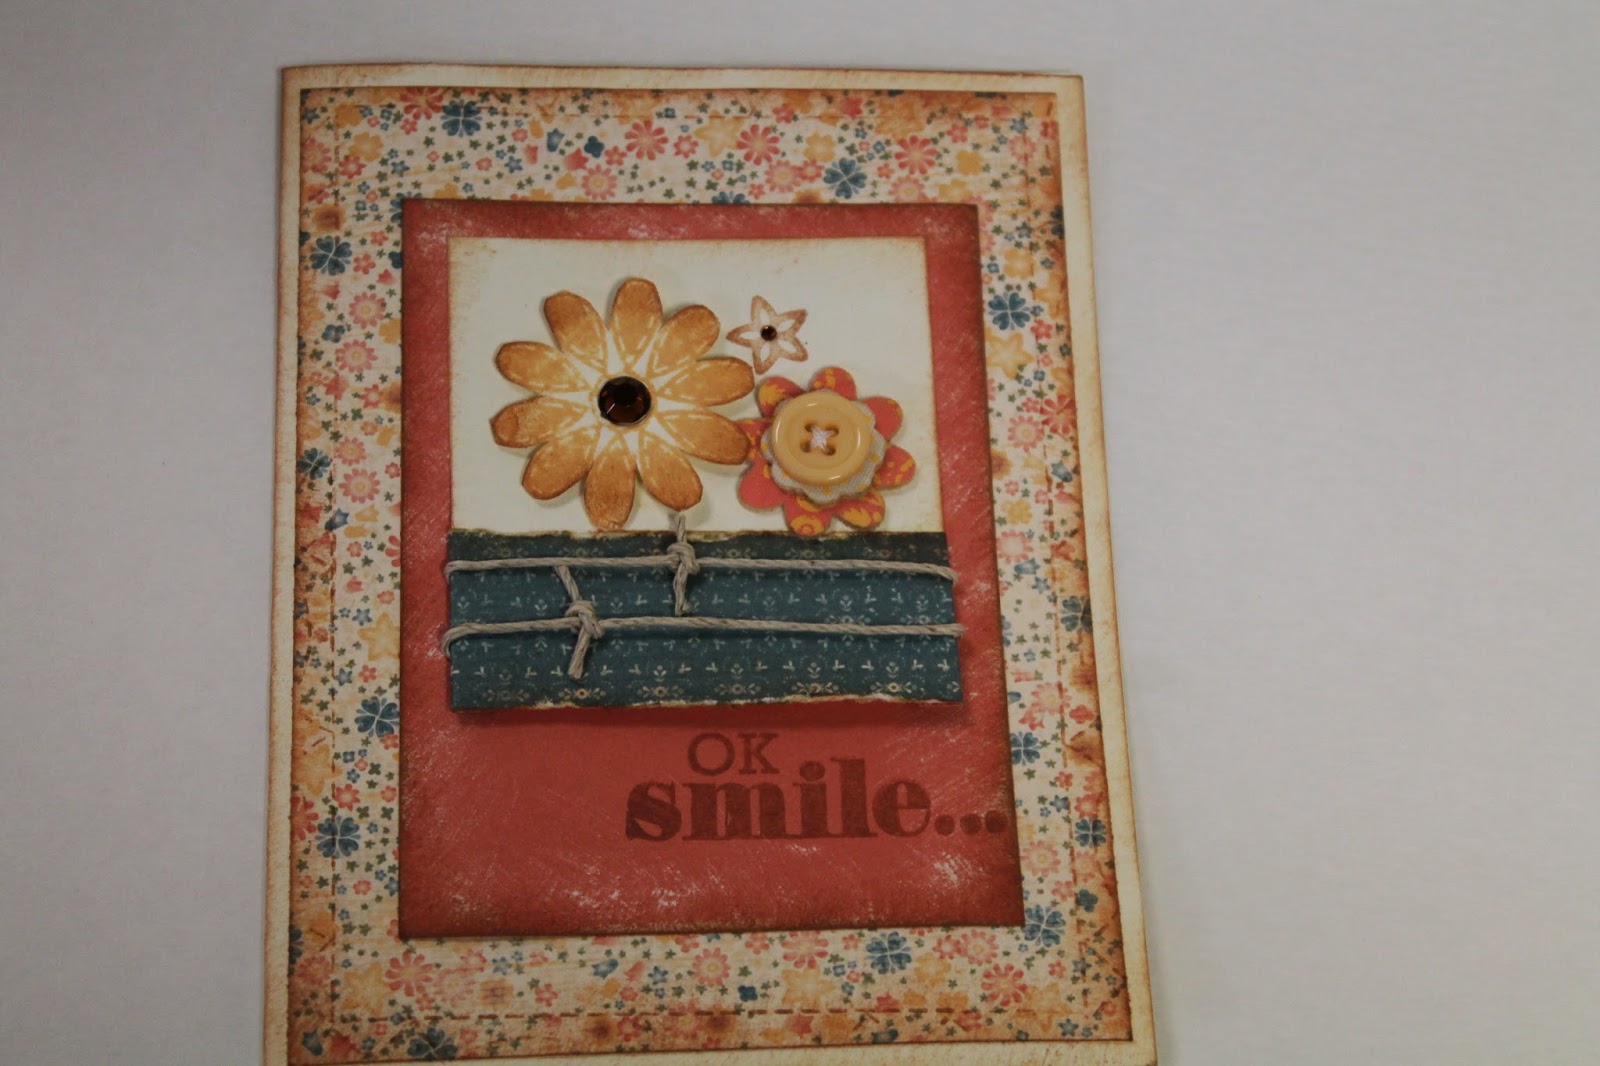
Here are a few cards that I have created in the last two days. 
I got my idea from a post by Wonda on Pinterest.  I needed a Congratulations card for a friend who was recently married and I think this one will do the trick.


 After posting this one I decided it needed a little something more so I am going to add a bow and tie it around the pink poke-a-dot strip.  I will re-post when I have it finished and you can let me know what you think.
 I had a pink fever today and since I love my pink and black washi tape, I felt this combo would go nice.  The butterflies are borrowed items from a great friend and talented artist Patti K.  There are 4 embossing folders and one die so it is easy to create   Thanks Patti!

Visit Patti's blog at www.stationarystyles.blogspot.com  where you can find her artwork AND her a link to her creative line of over 400 homemade  and stylish neck scarves that you will fall in love with.  Visit her site at http://www.neckstyles.com/  Visit her site often, because there are always new styles and great specials.

 Here are the butterflies again using the paper from Dotty for You paper pack from Close To My Heart.
 Here is the inside of the card.  I used the die to take out part of the blue poke-a-dot and part of the cardstock area to pull the butterflies in to the inside of the card.
 This was another card that was inspired from Pinterest and was pinned from Splitcoaststampers.  I get their weekly inkling and love their new ideas.  They always include direction along with a video so you can try new techniques each week.  One of my favorite places to visit:)
 This is the inside of the card.  I usually make a few cards for my friend Victoria.  She sends out cards often so she keeps me motivated with creating new ones for her.
 
I tried to take a photo of the glitter I added to the flowers.  I decided the words going up the side were a nice touch to something new.  Another one made with Victoria in mind.

Well I hope you have enjoyed your visit.  Please leave a  comment  and I will come visit you too!  If I can get up to 200 followers, I will offer blog candy to celebrate!   So tell all your friends and visit often,  Thanks  Theresa

Tuesday, June 24, 2014

Crafing with Friends

I saw a technique used on a card and really wanted to try it.  Turns out I love it.  Here are the cards I made.

They look complicated but were very easy to make.  I cut all the pieces but did not attach them.  I used removable tape to layer just the white (one card has yellow) pieces.  Then I stamped the images on just the white/yellow being careful to make sure all the stamp makes contact.  Since it is several layers high in some areas, you need to make sure you are paying attention to make contact with the entire stamp.  Sounds complicated but it really is not.  Leave room for your sentiment if desired.
Once all the pieces are stamped as much as you would like, start your layering.  With each layer having its mat just slightly larger.  I think it has a really cool effect and plan to make more of them soon.
All of these cards (except for one I gave to Patti)  went to a friend who loves my cards to send to her friends. She usually buys all the cards that I make and offer.  I am cleaned out of cards now so I will have to make more but I might CASE a technique from some where.... so come back soon to see what I chose to do!  Thanks for stopping.

Cards: Kitty and Butterflies

I have two grand daughters: Phaedra and Briar)   Phaedra is only three but loves to get mail.  Just this week they lost their kitten.  He got outside and was no where to be found.  Amber, our daughter called to let us know that she was going to the city shelter to see if one that was found was theirs.  Long story, it was!  So I made a card letting Phaedra know that I was sad they lost their kitty, that I prayed for the kitten to come home and was so glad to find out mommy was bringing him home!  I said that sometimes our prayers are answered and sometime we have to wait.  And sometimes we don't get our prayers answered till we get to Heaven.  I felt this is a good time to share that so if there are times when she feels she does not have them answered, she will remember her kitten coming home.  I leave them simple, without any embellishments that could be put in the mouth of Briar, her two year old sister.
Here is the one I made for Briar.  I bought a lot of stickers to use on the cards for the girls.  I have made a few cards but forgot to take pictures before I mailed them.  But I will post some of the wonderful cards I made last time I was with a few crafty ladies from Spooner area last month.
Thank you for stopping and I am hoping to get up to date on my blog.  It has been a very busy life here lately with having 8 children and moms to help get settled.  Hope to see you again soon.  Theresa

SCRAPROOM reloaded 2014

Hello.  I am back!  Here are some pictures of my scraproom reorganized.  I kinda have a thing about cleaning and reorganizing.  Sometimes I enjoy that more than scrappin!  (its ok, my husband is my intervention, he will encourage me to create)
I have many ways that I organize my paper, cardstock and stampsets that make my crafting easier and did not cost a fortune.  I will share them as I go.  Then I will post my latest creations.


 Here is my craft room.  Busy looking because I have so much stuff.  I have three tables that can be pulled apart so I can have quests. I have many of my cards that I have made and that have been given to me displayed for inspiration and a reminder that I am loved.


  I recently had this tall wooden cabinet returned to me.  I gave it to my sister and said if she ever wanted to give it back.... so here it is.  About 10 years later!  I love it because I have two section where I can hide things that just look messy sitting out.  My husband came down last night and said I did a great job on my scraproom, he hardly recognized it!  On the far right is my Sailors wall.  My youngest is in the Navy and I have a nice picture of him here so he can always be close to me.  I love when he comes for visits but since he is stationed in California we dont see him often.  Below him is a set of two cabinets that I got very reasonable.  (more about that in the next photo)


 This wall is where my printer and books are located.  I have this wonderful desk with two pull out selves that I got from Goodwill for $25!  It is in perfect condition and I live it.  I store projects I am working on under the pull out shelf, where they are easy to get to.  The shelf unit was originally a cabinet with doors.  One door was damages so I got it very cheap and just removed the doors.  I got a set of two, the other one the doors were perfect so I left them on.   There are plenty of selves that go with both the selves.


 Next is the area where I store most of my often used items.  I have my cricut, cardstock, and stamps mostly in this area.  The bottom black and grey items are metal shelving that I custom sized the height to fit my needs.  On the very top are shelves that store most of my stamps by catigory and other often used supplies.  On the metal shelves are three units that I made from ideas on youtube using foam board.  I was afraid  they would be flimsy but they are very strong for what I use them for.


I just had to share my inspiration station.  These pinned up cards are made by a good friend and great artist, Patty K.  She creates the most beautiful cards.  She is my inspiration and mentor since she is the one who taught me how to scrap from the beginning about 8 years ago.

Well this is my scrap room.  Thanks for stopping by and if you have any questions or concerns on how to organize your supplies, contact me and I will help you with some cheap and easy ways to get organized.  I feel a organized room is a functioning room and you get more done.  I would be glad to help. 

Friday, April 18, 2014

No Sew Quilted Card

I am back and have a wonderful card to share with you.  My friend Patti introduced me to Make It Monday and a few other blogs. Visit her blog at stationarystyle.blog and see some wonderful artwork!!
Make It Monday had a NoSew challenge and I made this card- too late for the challenge (I made the following Monday) but I like the card and want to share.


The paper products are all CTMH.  Colors are: Crystal Blue, Bamboo, Heavenly Blue and Sweet Leaf (green) from the paper pack Miracle.
The embossing folder is Divine Swirl from Provo Craft.  The buttons and waxy flax used in the button holes are from CTMH.  I love waxy flax, it s so easy to use.  The wax coating makes it very easy to thread holes, tie bows and form the thread to the shape you need.
The pearls and ribbon are also from CTMH.  I was a consultant for 7 years but with declining sales I am currently not selling the product.  If I were to get a few interested customers, I would consider signing up again the next time they have a great sign up bonus.  Let me know if you are interested.
The tri-fold card base is from K&Company called Beyond Postmarks.  It was one of the very first card making supplies I bought.  I don't remember where I got them from but it was a great deal: 6 cards and envelopes for $2.99.
Well back to cleaning my scraproom and then I hope to create something new today.  Remember everyday is a good day when you have INKYfingers!  See you next time.